

Multifunctional Filter Drawer
Category: Other accessories
Users are often racked by the task of choosing and matching dazzling filters as well as adapters when it comes to using a filter drawer. It just becomes more confusing for those who are quite new to astrophotography. To solve this problem, Askar introduces a multifunctional filter drawer. The major feature or strength of this filter drawer is its integration of the most marketable filters, telescope and astronomy camera adapters. Users basically don’t need to worry about the related issues any more with this five-in-one filter installation device.
leave a message now >Product introduction
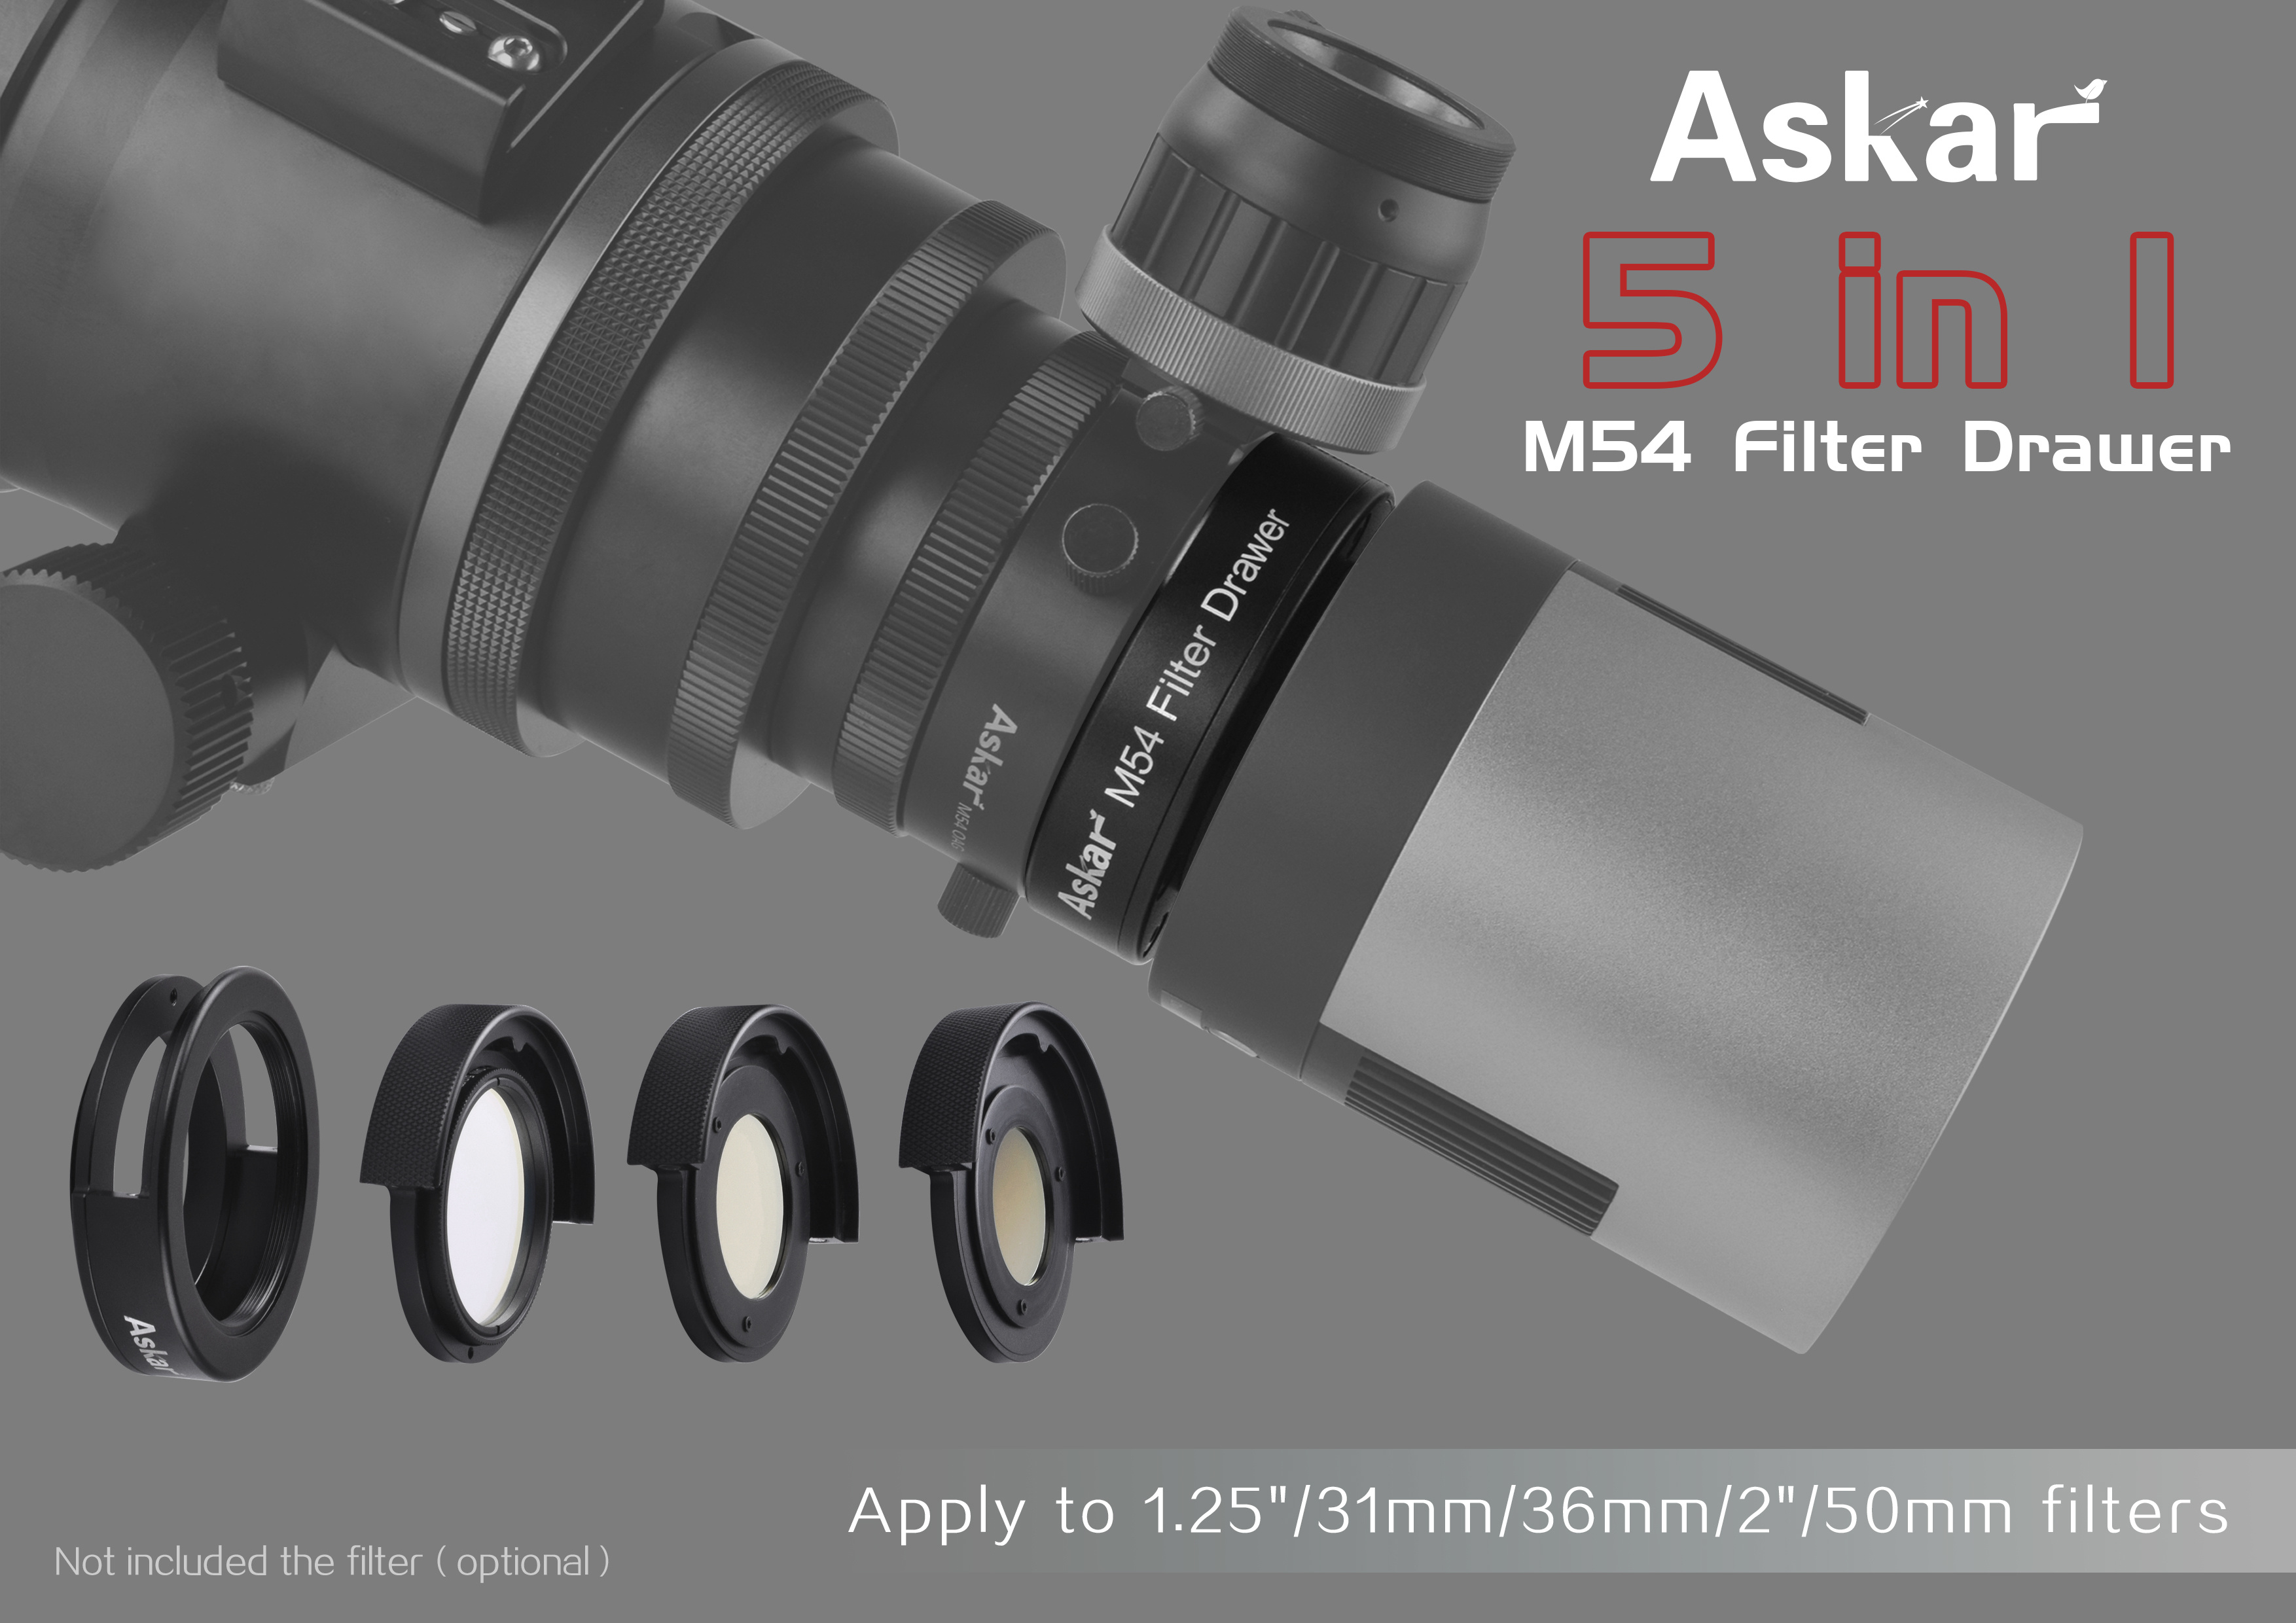
Users are often racked by the task of choosing and matching dazzling filters as well as adapters when it comes to using a filter drawer. It just becomes more confusing for those who are quite new to astrophotography. To solve this problem, Askar introduces a multifunctional filter drawer. The major feature or strength of this filter drawer is its integration of the most marketable filters, telescope and astronomy camera adapters. Users basically don’t need to worry about the related issues any more with this five-in-one filter installation device.
Assembly Steps
Users have to follow the certain steps to successfully assembly the Askar filter drawer and put it into the light path to fit the whole optical system:
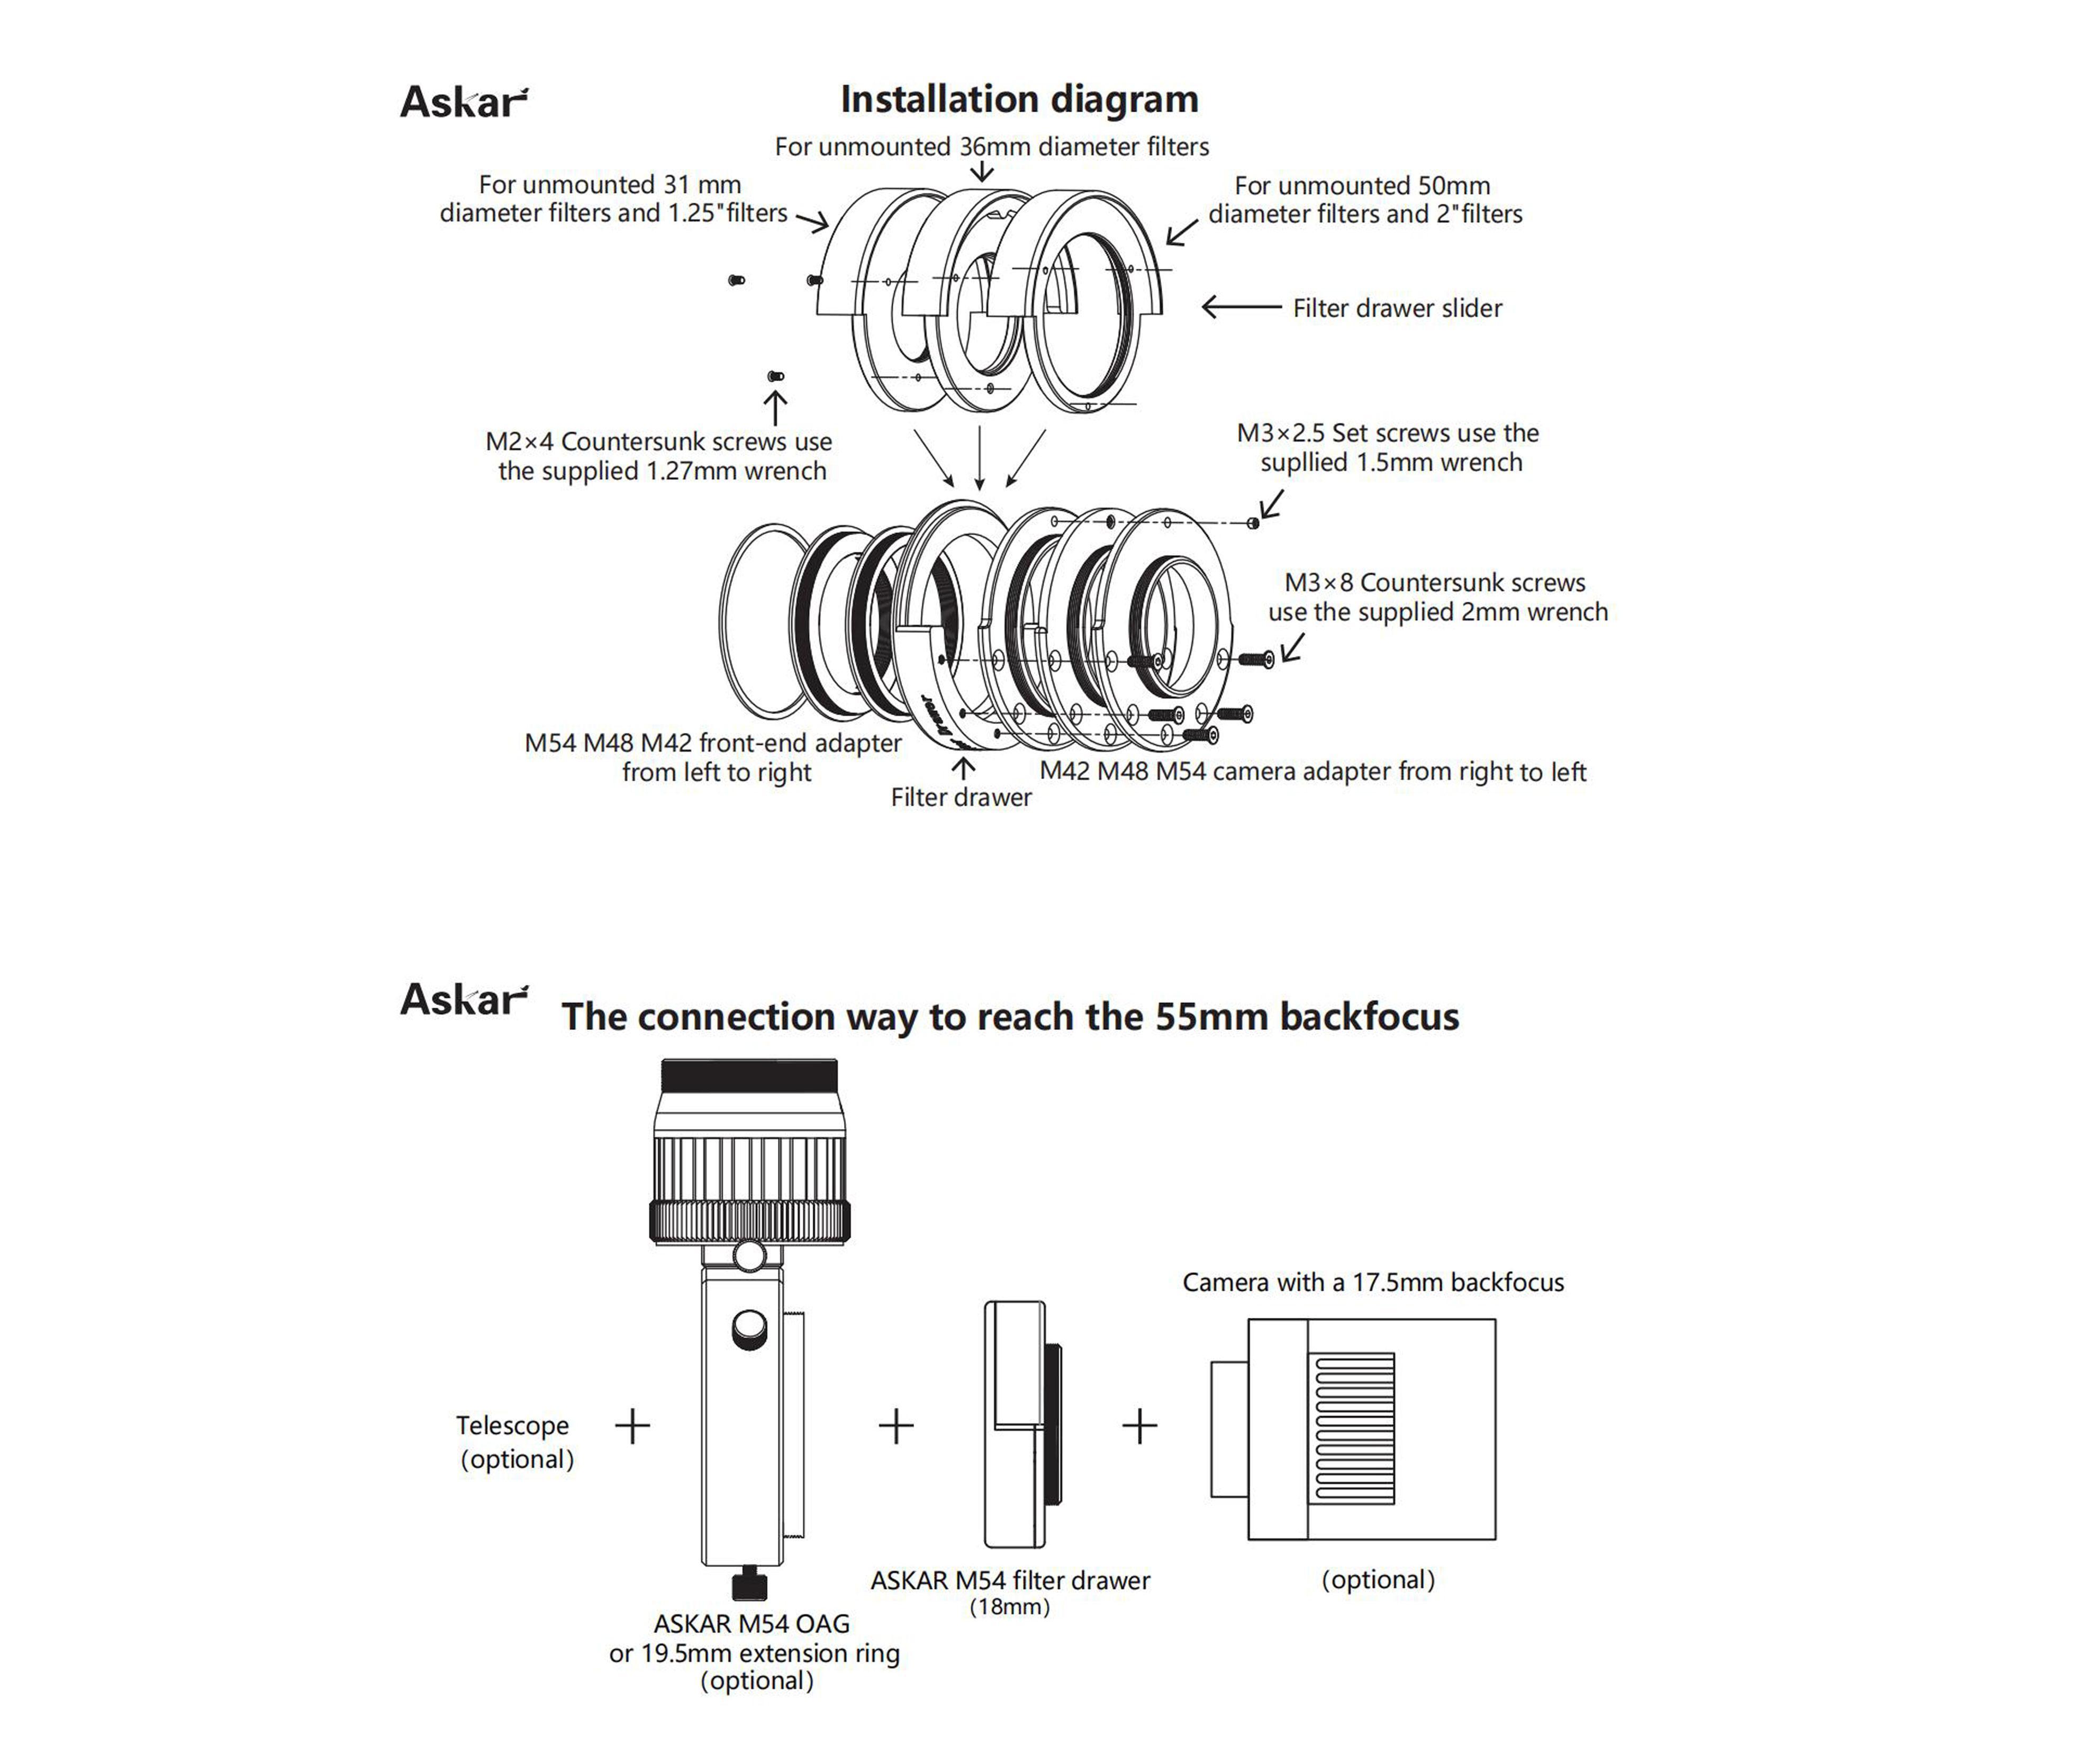
1. take out the main body of Askar filter drawer
2. choose a proper camera adapter according to the thread type of your astronomy camera
3. fix the camera adapter on the main body with 5 M3×8 countersink screws and wrench of M2
4. choose a proper telescope adapter according to the thread type of your telescope
5. thread on the telescope adapter
6. connect the filter drawer and your telescope
7. connect your astronomy camera and the filter drawer
8. make sure that these accessories are tightly connected and the whole system has a correct back focus. You can add extra spacers(optional) to reach the required back focus
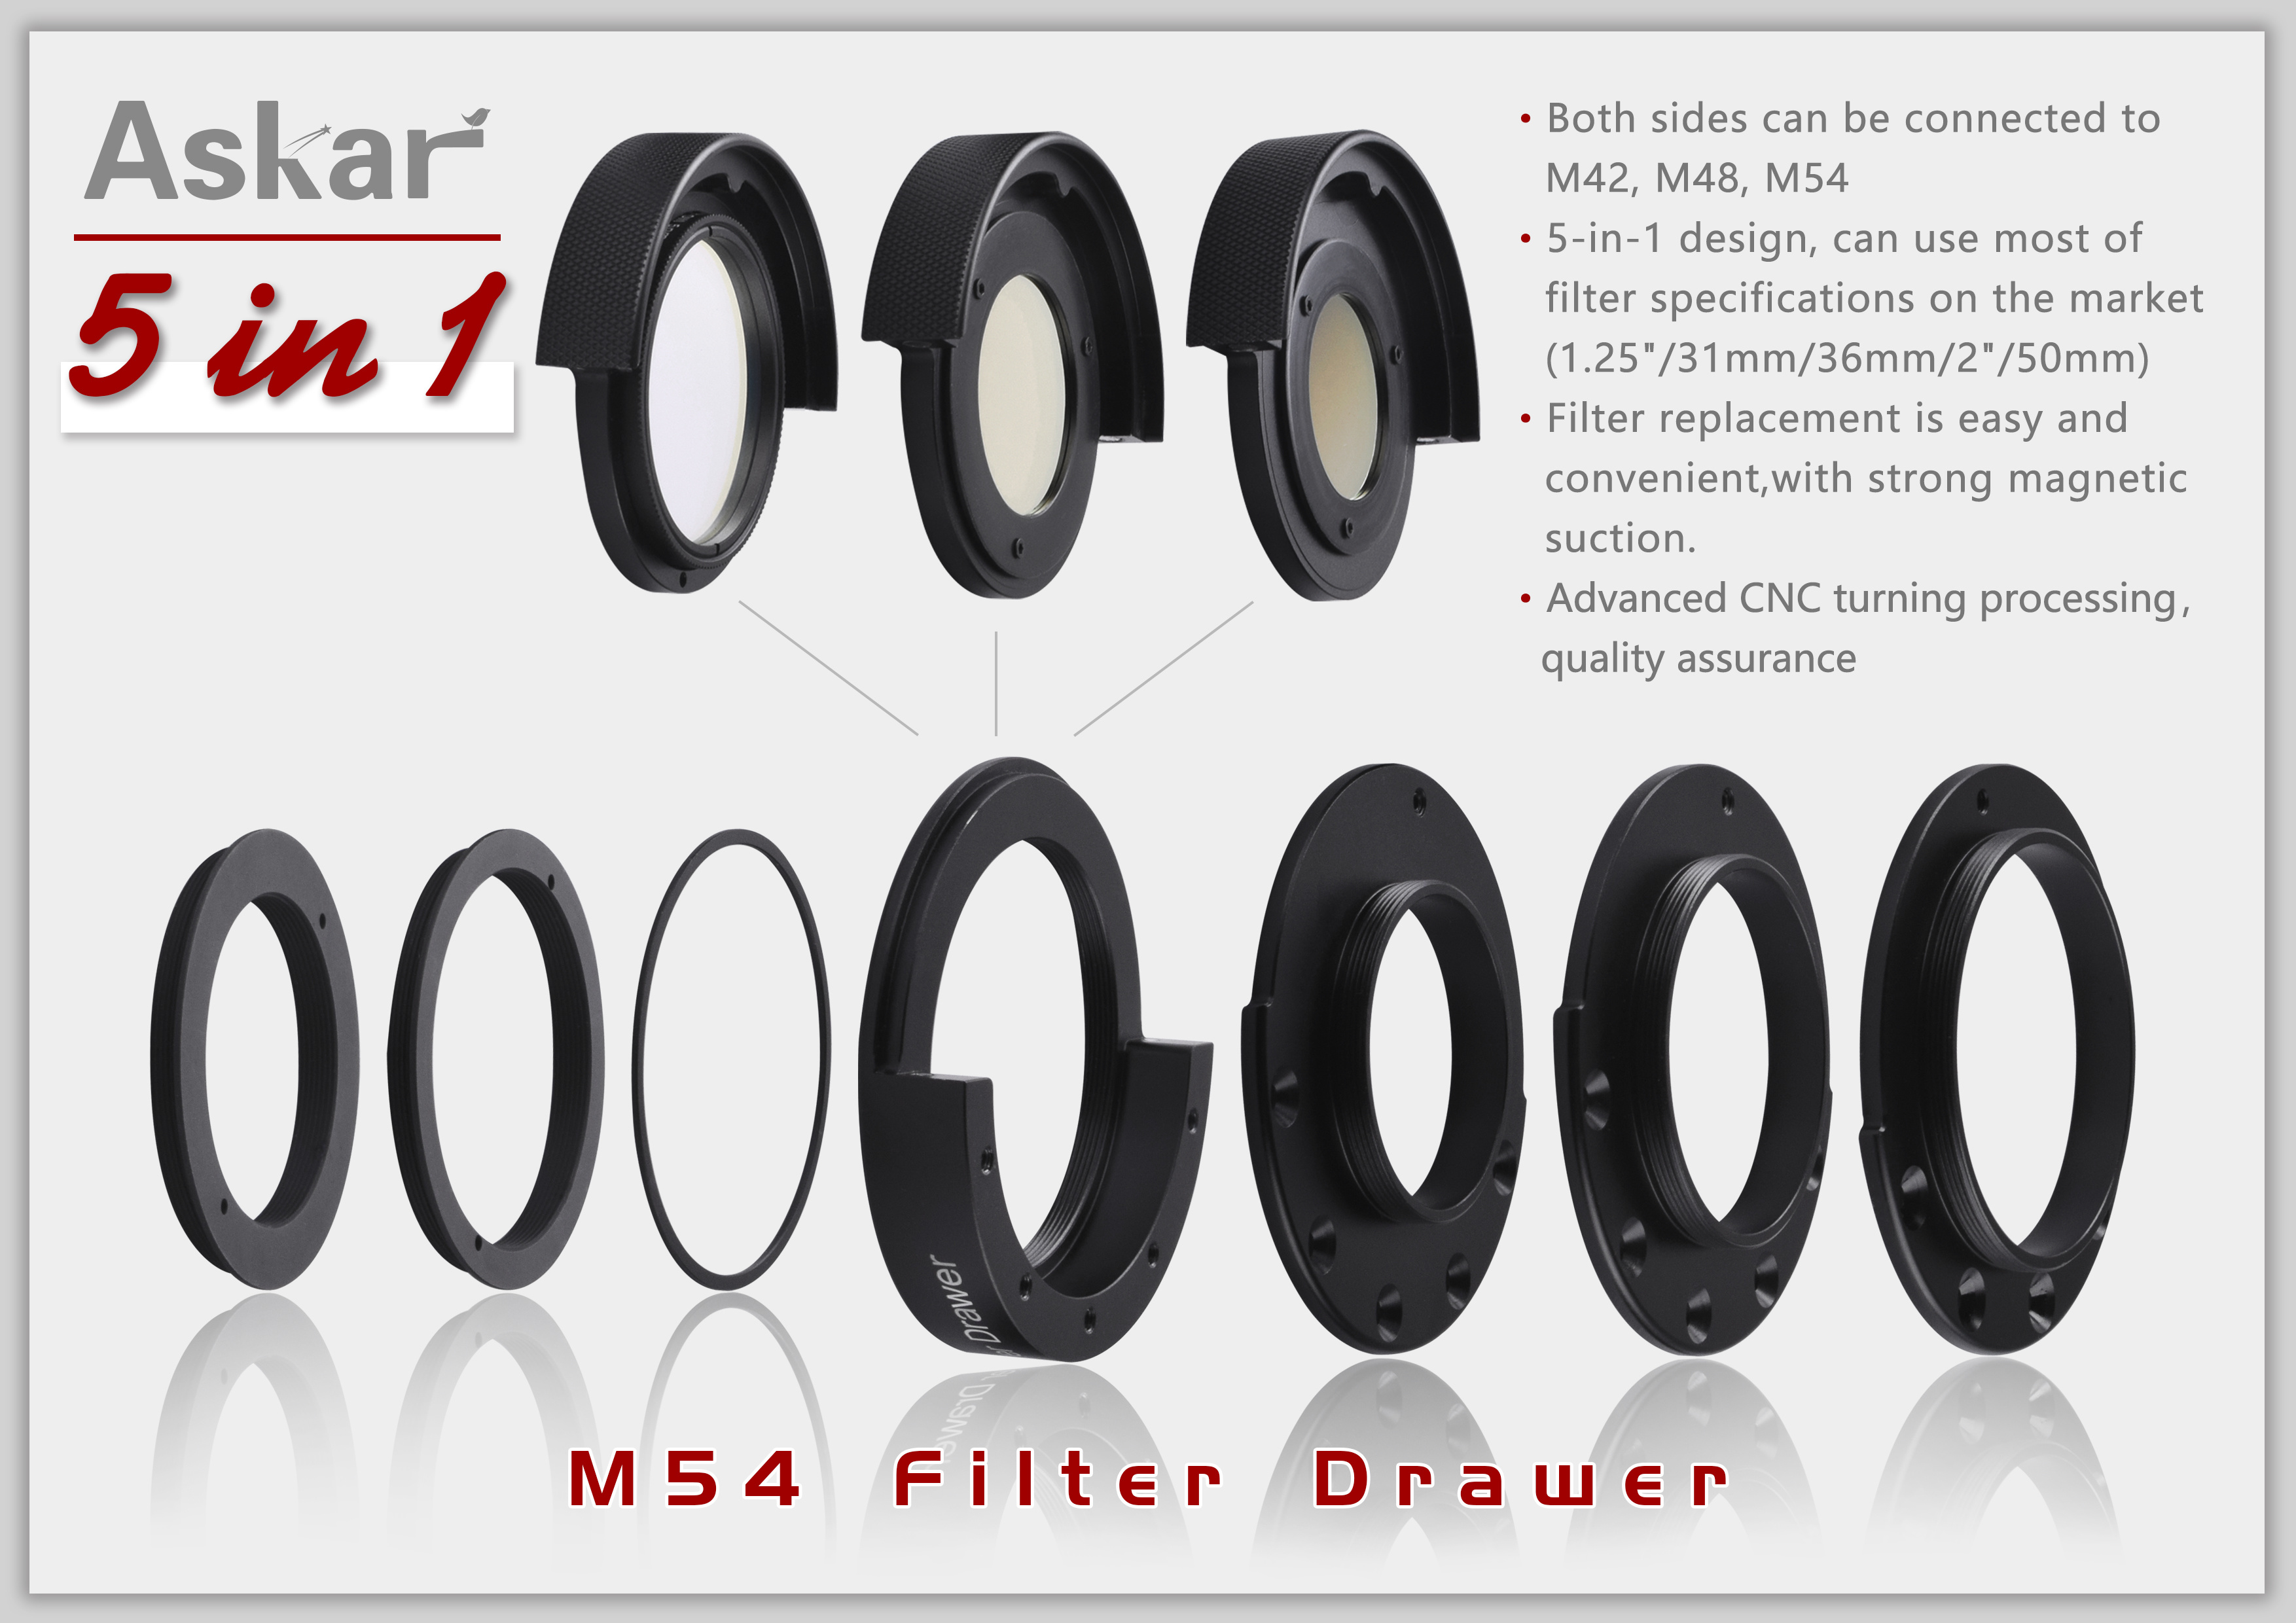
9. choose a proper filter slider according to the filter you are going to use. If it’s a 1.25" or 2" mounted filter, directly thread it onto the filter slider. And if it’s a 31mm, 36mm or 50mm unmounted filter, gently put the filter into the circular groove and superimpose a filter holding ring, fix the holding ring with 3 M2×4 countersink screws and the wrench of M1.27 to securely hold the filter between.
10. Insert the filter slider into the Askar filter draw and it’s ready for astrophotography
Specifications
|
Basic Components |
|||||
|
Name |
Function |
Feature |
|||
|
Main body of Askar filter drawer |
accommodate the filter slider; connect the telescope and the astronomy camera |
smooth coating; classic Askar logo |
|||
|
Filter slider |
carry the filters swap different filters |
designed with threads and circular groove for the attachment of both mounted and unmounted filters; the filter slider with the smallest opening is used for the attachment of 1.25" mounted filters and 31mm unmounted filters; the middle-opening filter slider is used for the attachment of 36mm unmounted filters; the slider with the largest opening is used to attach 2" mounted filters and 50mm unmounted filters |
|||
|
Adapters at the telescope side |
to connect the filter drawer and the telescope |
designed with M42, M48 and M54 thread |
|||
|
Adapters at the camera side |
to connect the filter drawer and the camera |
designed with M42, M48 and M54 thread |
|||
|
Filter holding ring |
to securely hold the unmounted filter |
three different sizes |
|||
|
M2×4 countersink |
to fix the filter holding ring onto |
|
|||
|
screw M1.27 wrench |
the filter slider |
|
|||
|
M3×2.5 grub screw M1.5 wrench |
to adjust the space between the main body and the camera adapter |
|
|||
|
M3×8 countersink screw M2 wrench |
to fix the camera adapter on the main body |
|
|||
Video
Images
Download
上一條: 2” Diagonal
RELATED PRODUCTS

")
")

Contact us

WANT TO SEE THE DISTANT STARS?
Contact Us Now!
3rd Floor, Building 5, Science and Technology Innovation Center, No. 1369, Chengnan Road, Nanhu District, Jiaxing, Zhejiang


